Tuesday, December 20, 2022

Money Card

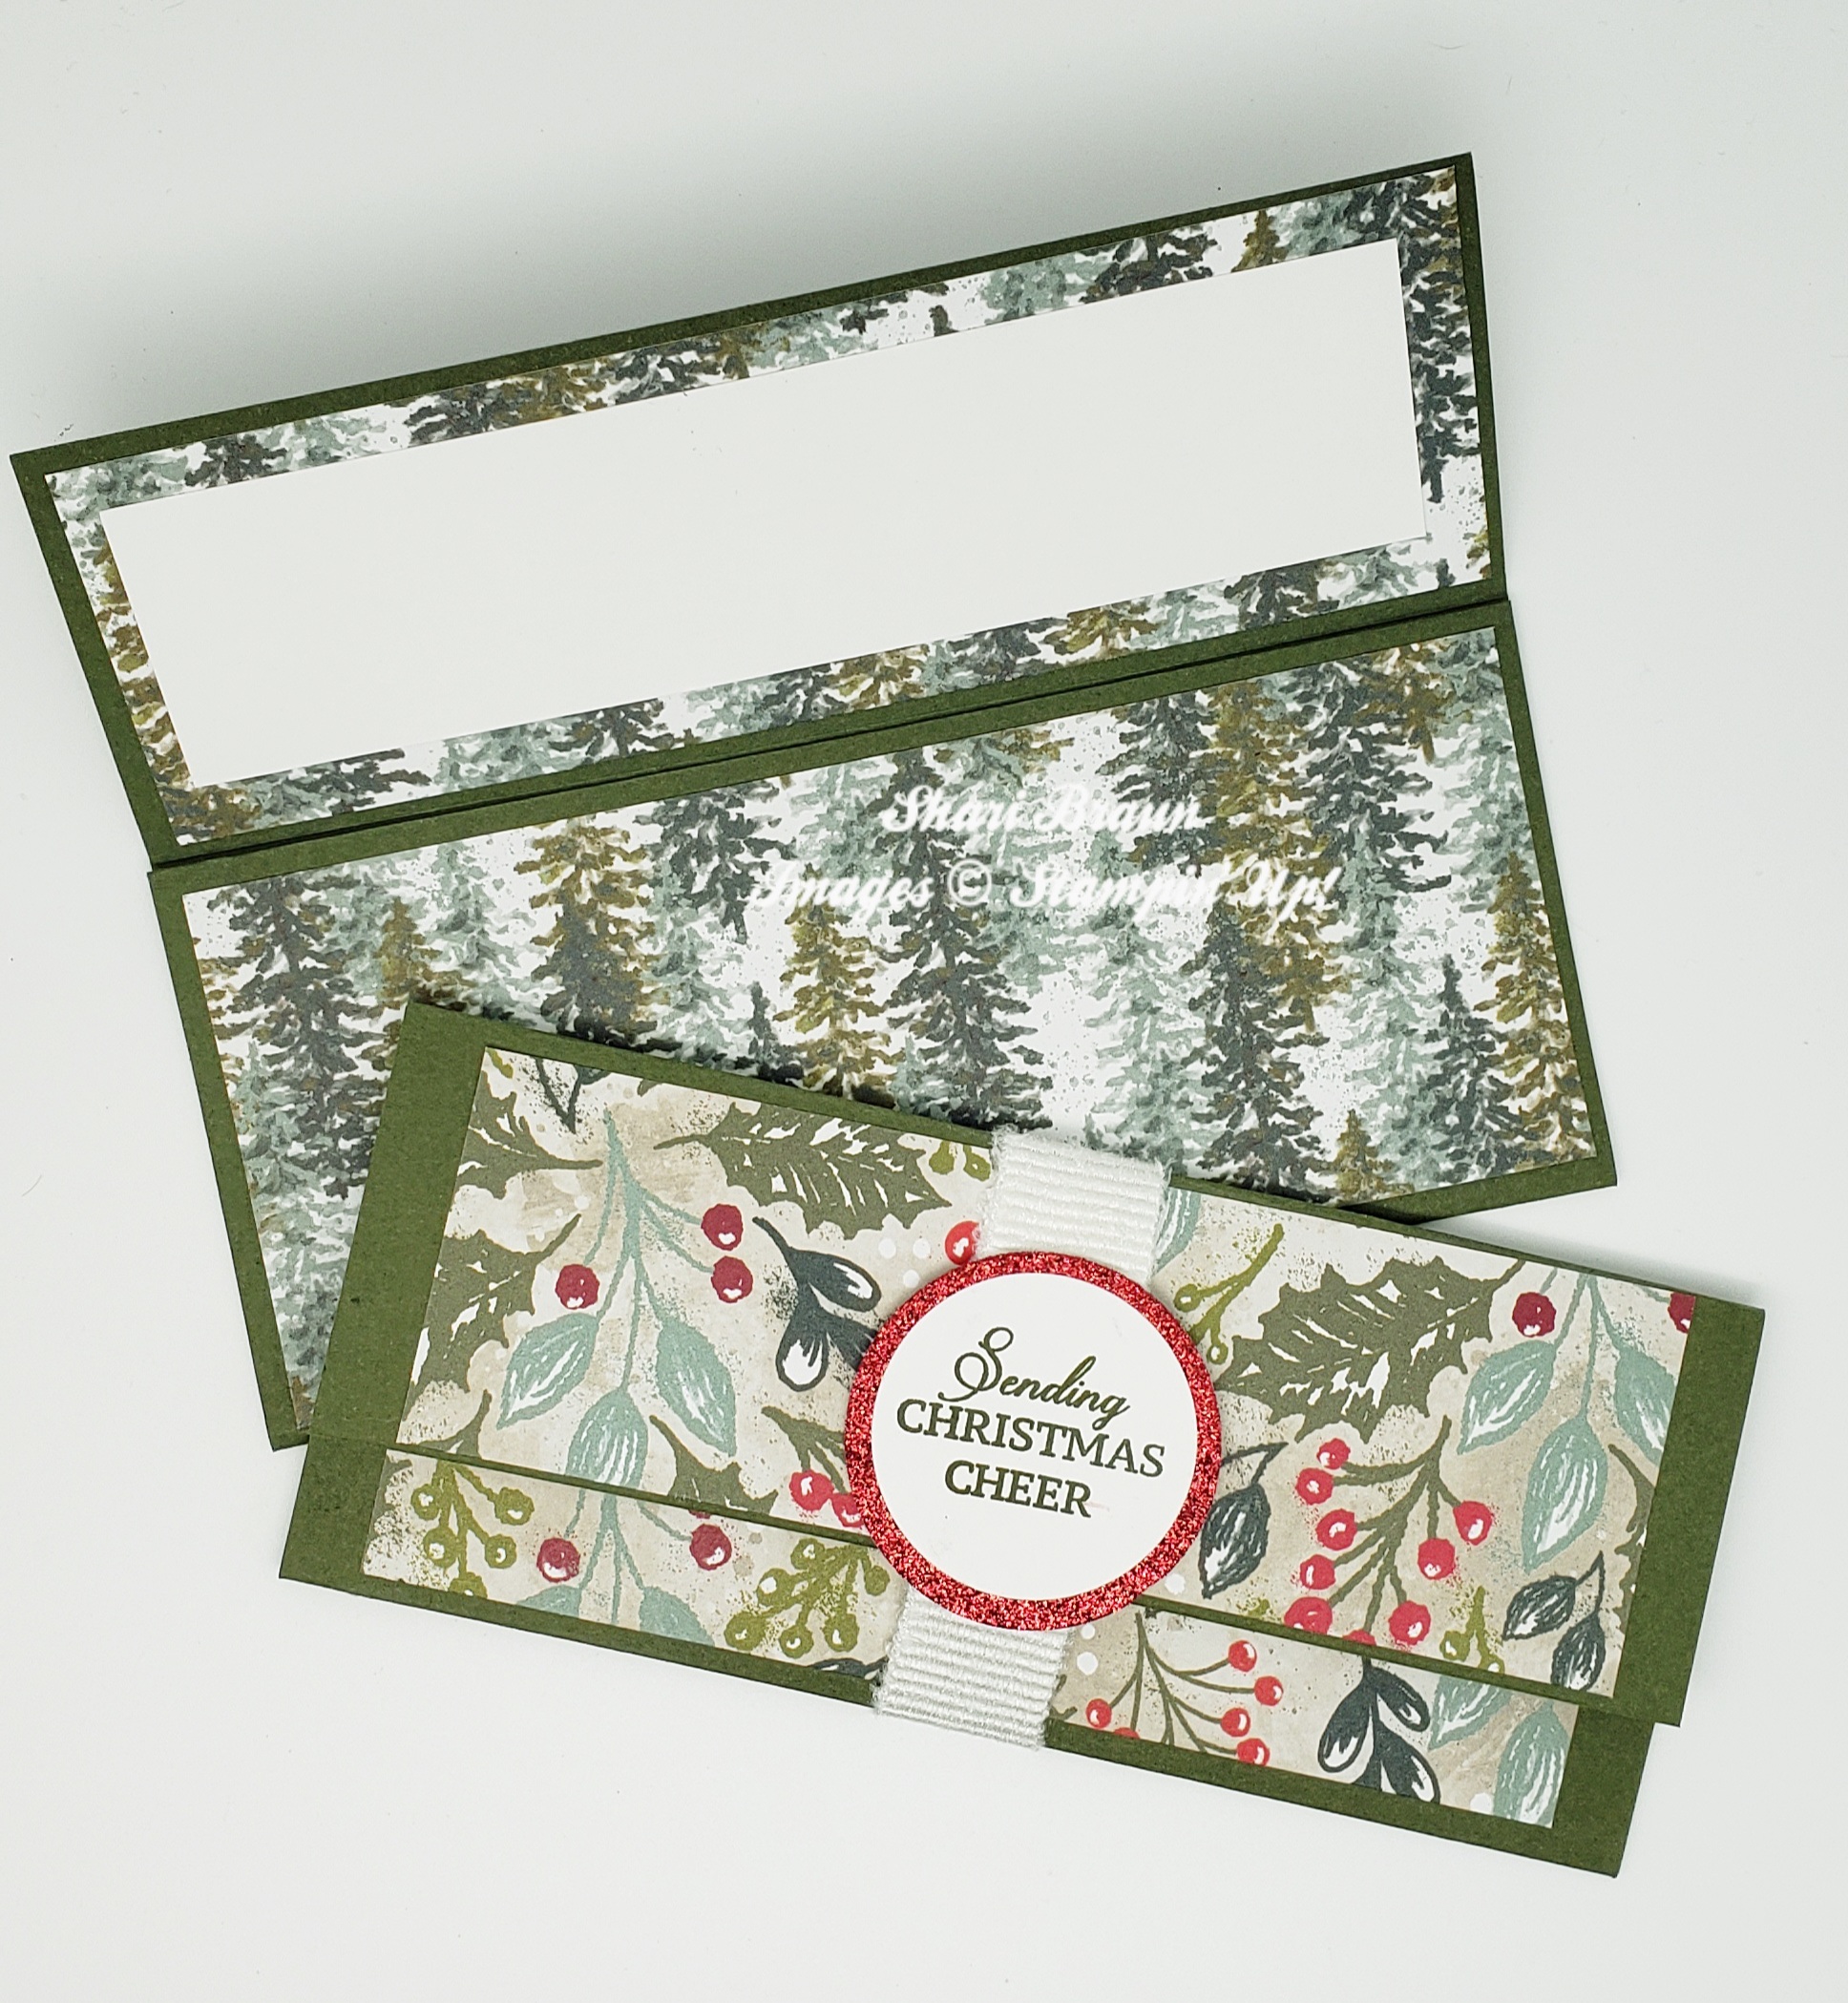
Looking for an easy card to make, to give a gift of money?  Then this card is for you!  I got this idea from another Stampin' Up! demonstrator, Dee Slater.  

Here's what you will need:

  • Base Card: 8-1/4" x 7" scored at 2-1/4" and 5-1/4" I used Mossy Meadow Cardstock
  • Mossy Meadow Cardstock
  • Basic White Cardstock
  • (3) Panels of designer series paper.  I used Boughs of Holly.
    • 6-3/4" x 2-3/4"
    • (2) 6-3/4" x 2"
    • (1) Panel of 6-1/4" x 1-1/2" I used Basic White Cardstock
  • Scratch piece for your sentiment
  • Mossy Meadow Classic Stamp Pad
  • 8" Wide Ribbon
  • 2" Circle Punch
  • Tear 'n Tape
  • Multi-Purpose Liquid Glue
  • Paper Snips
  • Paper Trimmer

First Step:  Cut out all your pieces.  

Second Step: Score your base card from the 8-1/4" side, so that your card folds on the appropriate side. If you are using a 2" Circle Punch, you will want to punch the center of the lower section of your base card and the center of your biggest panel piece.

Third Step:  With the multi-purpose liquid glue, adhere the widest panel on the bottom/outside section. Your DSP panels should be glued to both sides of the top section.  The white panel adheres to the DSP that is on the top/inside part of your card.

Fourth Step: Using the Tear 'n Tape, tape the inside sides of the card.  Fold the bottom piece up to make your pocket.

Fifth Step: Stamp your sentiment.  Take your ribbon to wind around the card.  Put two strips of tear 'n tape near the top of the ribbon.  Adhere the ends together and cut off any excess ribbon.  Using the tear n' tape to adhere your sentiment on top of the ribbon.


Watch my video to see how this is put together.  Go to my shop to make any purchase(s) that you would be interested in or click on the image(s) below.  That will take you to my shop.  

Thanks for joining me today!  Have a wonderful Christmas!


Product List

Sunday, December 18, 2022

Two Halves Make a Whole -- Regency Park Suite

Today I am going to show you how simple it is to use one layout for several different types of cards, using the new Regency Park Suite Collection.  This Suite will be available January 5th and is part of our January-April 2023 Mini Catalog. 

I made a simple thank you card with this layout.  It can be used for birthday cards, sympathy cards, etc.  It is so versatile! There are eight simple steps to follow.   I call it "Two Halves Make a Whole."


Here's what you will need:

  • Base card:  5-1/2" x 8-1/2", Balmy Blue Cardstock
  • Layer: 4" x 5", Mango Melody Cardstock
  • 2 Half Strips 2" x 4-3/4"each, 6" x 6" Regency Park DSP and Balmy Blue Shimmer Paper
  • Inside Piece: 4" x 5-1/4" Basic White Cardstock
  • Night of Navy Classic Stamp Pad
  • Night of Navy Border Ribbon 7" and 5"
  • Embellishments:  Milky Dots
  • Stampin' Seal
  • Paper Snips
  • Bone Folder
  • Paper Trimmer

Step One: Cut all the sizes of paper that you will need, and your two pieces of ribbon.

Step Two: Stamp your sentiment to the side (either side - your choice) of the Shimmery Balmy Blue Paper.

Step Three: Using your Stampin' Seal. adhere each half to the layering piece.  They will overlay a bit in the middle because you are trying to get an even border all around the half-pieces.This will make your "whole piece."

Step Four: Take the 7" ribbon and lay it across where the two halves meet, adhering the ends to the back of the layering piece.

Step Five: Adhere what you just completed, to your base card.

Step Six: Take your 5" piece of ribbon and tie a knot around the 7" piece.  Place the knot wherever necessary so that it doesn't cover your sentiment.

Step Seven: If you choose to use your seal, place your inside piece on the inside of your card.  The Balmy Blue Cardstock is light enough that a message could be written on it and a white insert is not necessary.  The choice is yours.

Step Eight:  Finish it off with some embellishments.  I used the Milky Dots that come with this suite.


There you go!  A simple, yet elegant, beautiful card!  You can make your card with me simply by going to my video and following the steps with me.  

To purchase any of the tools needed, you can go to my shop, using the Host Code: WP379DAX or click on the image(s) below.  You will not be able to get the Regency Park pieces yet, as they are not available until January, so make your wish list now and on January 4th, make your purchase(s)!

Thanks for joining me today!  Happy Stamping!

The Regency Park Suite Collection is not shown below because it won't be available until January 5th.  All the other products you will need to make this card are listed.


Product List

Sunday, December 11, 2022

Baby's First Birthday Card

Do you know someone who will be celebrating their first birthday?  Then this card is for you!


Here's what you will need:
  • Base card: 8-1/2 x 5-1/2 Soft Seafoam Cardstock
  • Top Layer: 4 x 5-1/4 Soft Seafoam Cardstock
  • One scrap piece of each: Daffodil Delight, Pumpkin Pie, Tahitian Tide, Highland Heather
  • (3) Scraps of Basic White Cardstock
  • Elephant Parade Stamp Set
  • Alphabet Bundle (Stamps set and punch)
  • Paper Snips
  • Bone Folder
  • Stampin Dimensionals
  • Paper Trimmer

This card involved a few pieces to color.  These are the ink pads and blending pens that I used:
  • Soft Seafoam Classic Stamp Pad
  • Tuxedo Black Memento Stamp Pad
  • Real Red Blends Combo Pack
  • Smoky Slate Blends Combo Pack
  • Petal Pink Blends Combo Pack
  • Shaded Spruce Blends Combo Pack
  • Parakeet Party Blends Combo Pack

Step One: Using my scraps I stamped the balloon, the leaf, and an elephant image from the Elephant Parade Stamp Set.  

Step Two: I punched out 8 of the shape found on the punch, two of each of the colored scraps.
Step Three: I stamped the layer with the star stamp, in soft seafoam, creating a light background pattern

Step Four: I colored the elephant using the smoky slate and the petal pink blending pens. The leaf was colored with the dark-shaded spruce blending pen and the light parakeet party blending pen. The balloon was colored with real red blending pens.

Step Five: Using my paper snips, I cut out the elephant, leaf, and balloon images. To make it easier for yourself, there is the Elephant Parade Bundle, which is the stamp set and the die cuts.  I just don't have the die cuts.

Step Six: I stamped the punched pieces with the letters that spelled birthday.

Step Seven: Using the Stampin Dimensionals, I first placed the layered sheet on top of the card base, Then the colored images and punches.

Now you are ready to say, "Happy Birthday Sweet one!"

Thanks for joining me today!  Check out my video to see how this card was made.  If you wish to purchase anything, go to my shop, or click on the image(s) below that you are interested in.  Doing so will take you straight to my shop.

Happy Stamping!


Product List

Kits

My last two videos were all about some kits that have arrived!  The first one was our Paper Pumpkin kit which was all about gift tags!  You can put together all your tags for Christmas in one sitting.  They are very simple to make and loads of fun!


Paper Pumpkin is a subscription to receive a kit on a monthly basis.  You can subscribe on a month-to-month basis, a six-month, or a yearly subscription.  Each month brings a new surprise with simple instructions on how to put together the contents.  You will find one month you are making cards, and the next month you could be putting together a special treat packaging.  It's a fun surprise that comes to your mailbox each month!  Sign up today by going to my store.  Click on the menu button>view all>kits-paper pumpkin and fill out the information.  Your first kit will arrive within the next month!


The second kit that I showed was regarding the newest kit that was added to our collection, entitled "Timeless Greetings!"  This one is a great kit to use for all the men in your life!  


Every month a new kit is added to our collections.  These kits vary from birthdays, to thank you cards, to holidays, to party packaging... you name it, there is a variety to choose from.  Just visit my store, click on the menu, then the kits button, and all your options will be there for you to look at.  Purchase a kit as a gift for a friend or family member.  Have a group of friends over for a kit-making party!  It's a box full of fun for everyone involved!

If you have any questions concerning either of these types of kits, please contact me at my store, click on the about me link, and at the bottom of the page is a contact me link.  Click on that box and let me know how I can assist you.  


Happy Stamping!


Template #6

 This easy card came from Stamping with Amy K.   It's so quick to put together.  You will absolutely love the quick and easy approach! ...