Today, I am sharing a unique fun fold. I don't know if there is a particular name for it, so I created one. My friend Robyn Rasset shared this with a group of us, and I thought it would be fun to share it with you! The name makes it sound more challenging than it is. It is very easy to do. You can watch how it is done and follow the instructions in this post.
First, you will need an 8 1/2" X 11" piece of cardstock. Inserting your cardstock vertically into your trimmer, you will cut this piece in half at 4 1/4". This will give you two pieces to make two cards.
Next, you will place your piece of 11" X 4 1/4" horizontally into your trimmer and score at 4 1/4' and 5 1/2".
Choose a sheet of Designer Series Paper (6" X 6" is easiest to work with). You can use any DSP you would like; however, if you choose a sheet with scenery, you won't have to do much more than the card itself. If you choose something that is not scenery, you will want to add images, etc. to the card.
Here's all you will need for this card:
PAPER
- Fresh Freesia 8 1/2" X 11"
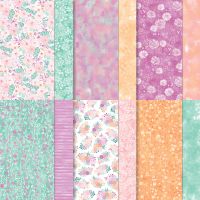
- Splendid Autumn Designer Series Paper 6" X 6"
- Basic White (optional) 4" square
STAMPS
- Unbounded Love
INK
- Tuxedo Black Memento
ADHESIVE
- Stampin' Seal
- Stampin' Dimensionals
EMBELLISHEMENTS
TOOLS
- Bone Folder
- Take You Pick
- Punch of choice
- Paper Trimmer


![Azure Afternoon 8 1/2" X 11" Cardstock [ 161719 ] Azure Afternoon 8 1/2" X 11" Cardstock [ 161719 ]](https://assets1.tamsnetwork.com/images/EC042017NF/161719s.jpg)
![Fresh Freesia 8 1/2" X 11" Cardstock [ 155613 ] Fresh Freesia 8 1/2" X 11" Cardstock [ 155613 ]](https://assets1.tamsnetwork.com/images/EC042017NF/155613s.jpg)
![Splendid Autumn 6" X 6" (15.2 X 15.2 Cm) Designer Series Paper [ 164173 ] Splendid Autumn 6" X 6" (15.2 X 15.2 Cm) Designer Series Paper [ 164173 ]](https://assets1.tamsnetwork.com/images/EC042017NF/164173s.jpg)
![Basic White 8 1/2" X 11" Thick Cardstock [ 159229 ] Basic White 8 1/2" X 11" Thick Cardstock [ 159229 ]](https://assets1.tamsnetwork.com/images/EC042017NF/159229s.jpg)
![Unbounded Love Photopolymer Stamp Set (English) [ 163378 ] Unbounded Love Photopolymer Stamp Set (English) [ 163378 ]](https://assets1.tamsnetwork.com/images/EC042017NF/163378s.jpg)
![Tuxedo Black Memento Ink Pad [ 132708 ] Tuxedo Black Memento Ink Pad [ 132708 ]](https://assets1.tamsnetwork.com/images/EC042017NF/132708s.jpg)
![Stampin' Seal [ 152813 ] Stampin' Seal [ 152813 ]](https://assets1.tamsnetwork.com/images/EC042017NF/152813s.jpg)
![Stampin' Dimensionals [ 104430 ] Stampin' Dimensionals [ 104430 ]](https://assets1.tamsnetwork.com/images/EC042017NF/104430s.jpg)
![Adhesive Backed Pearl Trio [ 163319 ] Adhesive Backed Pearl Trio [ 163319 ]](https://assets1.tamsnetwork.com/images/EC042017NF/163319s.jpg)
![Bone Folder [ 102300 ] Bone Folder [ 102300 ]](https://assets1.tamsnetwork.com/images/EC042017NF/102300s.jpg)
![Modern Oval Punch [ 162234 ] Modern Oval Punch [ 162234 ]](https://assets1.tamsnetwork.com/images/EC042017NF/162234s.jpg)
![Take Your Pick [ 144107 ] Take Your Pick [ 144107 ]](https://assets1.tamsnetwork.com/images/EC042017NF/144107s.jpg)
![Paper Trimmer [ 152392 ] Paper Trimmer [ 152392 ]](https://assets1.tamsnetwork.com/images/EC042017NF/152392s.jpg)


![Highland Heather Classic Stampin' Pad [ 147103 ] Highland Heather Classic Stampin' Pad [ 147103 ]](https://assets1.tamsnetwork.com/images/EC042017NF/147103s.jpg)
![Fresh Freesia Classic Stampin' Pad [ 155611 ] Fresh Freesia Classic Stampin' Pad [ 155611 ]](https://assets1.tamsnetwork.com/images/EC042017NF/155611s.jpg)
![Bubble Bath Classic Stampin' Pad [ 161664 ] Bubble Bath Classic Stampin' Pad [ 161664 ]](https://assets1.tamsnetwork.com/images/EC042017NF/161664s.jpg)
![Lost Lagoon Classic Stampin' Pad [ 161678 ] Lost Lagoon Classic Stampin' Pad [ 161678 ]](https://assets1.tamsnetwork.com/images/EC042017NF/161678s.jpg)
![Soft Sea Foam Classic Stampin' Pad [ 147102 ] Soft Sea Foam Classic Stampin' Pad [ 147102 ]](https://assets1.tamsnetwork.com/images/EC042017NF/147102s.jpg)
![Brushed Brass Butterflies [ 158136 ] Brushed Brass Butterflies [ 158136 ]](https://assets1.tamsnetwork.com/images/EC042017NF/158136s.jpg)

![Classic Stampin' Spots Assortment [ 153183 ] Classic Stampin' Spots Assortment [ 153183 ]](https://assets1.tamsnetwork.com/images/EC042017NF/153183s.jpg)
![Antique Pearls [ 164679 ] Antique Pearls [ 164679 ]](https://assets1.tamsnetwork.com/images/EC042017NF/164679s.jpg)

