Sunday, October 30, 2022

Birthday Card Organizer Kit

 Ever wish you were a bit more organized so that you would remember when to send a birthday or anniversary greeting to a friend or family member?  The kit I am about to show you today does that organization for you. All you have to do is check it once a month. In this post, I will also give you some tips to help you along the way.


When the kit comes in the mail you will find a beautiful floral-designed, spiral ring book, with 14 pockets to hold all the cards. With that book comes stickers, punch-out items, Stampin' Dimensionals, Tear Tape, Glue Dots, and Embellishments. There is also an instruction sheet to show you how to make the 12 cards (6 of two designs). 


I have been using two old Paper Pumpkin boxes to keep my cards organized.  I labeled them "Birthdays" and "Anniversaries."  When I am done making my cards for the year (which I do every January), I put the completed projects in those boxes.  I decided I would try this Birthday Kit this year and see how it worked for me.  Here are the steps I took to put it together.

  • The first thing I did was take the stickers for each month and put them in order on the different pages. (January - December)  
  • Second, I made all 12 cards.  They were pretty easy to do.  It took me about 45 minutes to do all 12.  
  • Thirdly, I wrote down on each monthly page, whose birthday or anniversary was in that month and the date. I then added each card, placing it in the appropriate pocket.  

When the first month comes along, I will then take out the cards I need, and lay them on my table where I see them all the time. (Cards are already signed and the envelopes are pre-addressed) I generally will put the date I want to mail them where the stamp goes.  When it's time, that date is covered with the stamp, and the card is placed in the mail to be sent out to the recipient!  

I have a fairly big family and generally make 20 adult cards each year.  Now the grandkids are coming and so I have added an additional 7 kid cards to the project.  It takes all of January to complete them since I have so many other things to do as part of my normal routine.  But the craziness of the holidays has dispersed and it's easier to tackle after all that has settled down.  This year I will probably create my own cards and I will hand some of these out for others to use.

I hope my tips and this kit will be a great help to each of you in the year 2023!  You'll have to let me know how it goes.  

To purchase this kit for yourself, go to my shop, or click on the image below.  To see how this is all put together, be sure to visit my video and see how simple it is from the start!

Happy Stamping!


Product List

Tuesday, October 25, 2022

Tree Lot Dies

 This particular post is to give recognition to the fun creativity one can have using just die cuts.  The die cuts that I used are now retired as they were a part of our last Sale-A-Bration period.  I haven't done anything with them as I am feverishly getting ready for a craft fair and I am now starting to bring in my Christmas & winter cards.


Through this post you can see what type of things you can do with your dies as you create your own cards.  The images below will show you what I used in the video which coincides with this post, and what other sets you can play with to make some very beautiful and creative cards.  You can purchase the dies separately, however, you do receive a 10% discount if you buy the bundle of stamps and die cuts.

For this card I used:

  • Night of Navy Cardstock
  • Night of Navy Classic Stamp Pad
  • Tree Lot Dies
  • Basic Gray Cardstock
  • Cherry Cobbler Cardstock
  • Scratch piece of Real Red Cardstock
  • Scratch piece of Basic Black Cardstock
  • Scratch piece of Basic White Cardstock
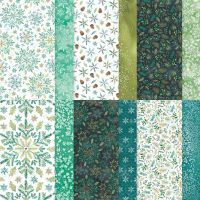
  • Snowflake Splendor Designer Series Paper
  • Red & White Glimmer Paper
  • Iridescent Pearls Basic Jewels
  • Pick Your Tool
  • Stampin' Cut & Emboss Machine
  • Paper Snips
  • Mini Glue Dots
  • Multipurpose Liquid Glue
  • Stampin' Dimensionals
  • Stampin' Seal

Should you want to try the die cuts for yourself, go to my shop and look through the bundles.  You can also click on any product below and it will take you to my shop.  

To see the Tree Lot Dies as a winter card, visit my Tickled Tuesday Video.


Product List

Sunday, October 23, 2022

Joyful Flurry

 Let's make a card that brings the flurry and magic of winter! 


You will need:

  • Cardbase: 5-1/2" x 8-1/2" Bermuda Bay Cardstock
  • (2) 5-1/4" x 4" Shimmery White Cardstock
  • Joyful Flurry Bundle
  • Bermuda Bay Stamp Pad
  • Fine Sparkle Adhesive-backed Gems
  • Stampin' Seal
  • Take Your Pick
  • Stampin' Cut & Emboss Machine

This card is really easy to put together.  Take your first Shimmery White Cardstock piece and choose two snowflake dies with which you would like to make your card.  I chose the largest one and one of the medium ones.  Cut those out in opposite corners, using the Stampin Cut & Emboss Machine.

Next, I stamped my sentiment between the cutouts and began to push out the little pieces from the back of the card with the Take Your Pick tool.  This gives the front side that 3D effect. 

I took the second Shimmery White Cardstock piece and stamped an image of one of the snowflakes in the bottom right-hand corner.  Then I glued the cardstock on the inside of the base card and the 3D piece on the top of the base card, using my Stampin' Seal.  

I finished by adding some Fine Sparkle Adhesive-back Gems to give it a bit more dazzle!

You can go to my video to see exactly how I did everything and for any product you wish to purchase you can go to my shop or click on the image below and it will take you to my shop.  

Host Code: FKAZVWZC

Thanks for joining me today!  Happy Stamping!


Product List

Tuesday, October 18, 2022

Warm Welcome

 This card is a simple invitation into your home for the holidays.  It can be used for a warm day of gathering with friends to a festive day with family at Christmas!  Come to my house to see how this card is made!


You will need:

  • Warm Welcome Bundle
  • Card base: 5-1/2" x 8-1/2" Soft Seafoam Cardstock
  • (3) 5-1/4" x4" Basic White Cardstock (You will need a 4th one of these if you                            choose to make a stencil)
  • Soft Seafoam Stamp Pad
  • Mint Macaron Stamp Pad
  • Black Memento Stamp Pad
  • Real Red Stampin Blends Combo Pack
  • Daffodil Delight Stampin Blends Combo Pack
  • Shaded Green Stampin' Blends Combo Pack
  • Stampin' Seal
  • Stampin' Dimensionals
  • Multipurpose Liquid Glue 
  • Festive Pearls
  • Take Your Pick
  • Stampin' Cut & Emboss Machine

I took my stencil piece and laid it on top of another basic white piece (5-1.4" x 4") With memo sticky notes I taped the two pieces down on the table.  I then took my door stamp and stamped the image inside the stencil. I took that image and started coloring it by blending two colors together, Mint Macron and Soft Seafoam.  I then took my door dies and I cut the image out using my Stampin' Cut and Emboss Machine. I glued that image to the top layer (another basic white piece), with the Multipurpose Liquid Glue.

Next, I stamped my sentiment on the top of the open door.  I took the last basic white piece and sealed that inside the base card.  

Then I stamped the image of the gifts on my scratch piece of basic white. I stamped that with the Black Memento Stamp Pad.  I grabbed my blending pens and colored the gifts.  I then cut them out with the die cut for the gifts.  I adhered the gifts in the middle of the open door with Stampin' Dimensionals, below the sentiment.  I added a green pearl from the Festive Pearl embellishments.  My home is open to all who come to visit!

You will need to go to my video to see how this is done.  If you are interested in purchasing anything, please to my shop, or click on the image below and it will take you to my shop.

Host Code: FKAZVWZC


Product List

Nature's Paintings Alternative Cards

 I have introduced you, through my videos of one of our latest kits entitled, "Nature's Paintings Kit.  It comes with a "color...