Monday, November 29, 2021

Bay Window Fun Fold

 My second post is in regards to the Bay Window Fun Fold Card.  This one took a bit to put together, but once it was done, I absolutely loved it!  It is so cool!


To make this you will need:

  • Card base of 4-1/4 x 11, scored on the long side at 3/8, 1-7/8, 3-5/8, 5-1/8, 5-1/2.  I used Basic Gray
  • You will need some Designer Series Paper, 4-1/8 x 6 - cut 1-5/8 off the end.  Then cut in the same direction pieces that measure 1-3/8, 1-5/8, 1-3/8 (x 4-1/8 in height)
  • Then choose a second DSP where you will cut 1/4 x 4-1/8.  
  • 3-1/2 x 4-1/8 of white cardstock
  • scrap paper for sentiment

I chose the Peaceful Place DSP for both my directional pieces and patterned pieces.

  • The 1-5/8 X 4-1/8 piece that was cut off the end of the DSP is adhered to the inside of the card, along the end.  
  • Cardstock choice cut at 3-1/2 by 4-1/8 is adhered on the inside of the card to write your note.  I also had cut out one of the cabin images and adhered that to the note card.
  • Adhere the 1/4 strips to both sides of the outside of the card (inside the 3/8ths score line).  Then take your directional DSP pieces and place them within the score lines on the top/outside of the card.  

Take your sentiment and place it in the middle of your card.  I chose one of the seasonal labels die and I placed silver metallic pearls on it for an embellishment.  I also cut out with the layering circle dies, a scalloped circle. This was adhered to the inside edge of the card with dimensionals.  I placed a gray granite shimmer ribbon on top of it with a glue dot.  The circle allows the end of the top side of the card to tuck under it when it is opened to create the bay window.


Product List

Square Quilt Card

 I've gotten behind in posting on my blog, so today I am trying to get caught up.  My first post is presenting all the details of the square quilt card that I did.

I used the following products to make this card:

  • (12) 1-1/4" squares of the Heartwarming Hugs Designer Series Paper (3 squares of 4 different patterns)
  • (2) 5-1/4 X 4" of White cardstock and (1) Gold Foil Paper
  • 5-1/2" X 8-1/2" of Mossy Meadow cardstock
  • Layering Circle Dies
  • Gingerbread & Peppermint Acrylic Shapes
  • Delivering Cheer Stamp Set
  • Old Olive/Pretty Peacock Reversible Ribbon
  • Painted Texture 3D Embossing Folder
  • Multi-Purpose Glue
One White cardstock piece will go inside the Mossy Meadow cardstock base.  The second white piece I placed glue, going in a horizontal direction, with our Multi-Purpose glue, on one-third of the piece and placed the squares in a row, then proceeding with a second row, then a third row. I changed the order of the squares to give it a quilt pattern.  After this dried, I embossed the piece with our Painted Texture 3D Embossing Folder to give it the cozy quilt look.

I glued this piece on top of the gold foil piece.  I put my ribbon around those two pieces, looking at the card vertically.  I then adhered those pieces with the ribbon to the card base.

I used two sizes of the layering circles to make my sentiment label, stamping my sentiment from the Delivering Cheer Stamp Set.  I adhered those with Stampin' Dimensionals and added the acrylics for my embellishments. 

Click on the image(s) below to order your products to make this card.

Product List

Wednesday, November 10, 2021

Seasonal Sale: Happening Now!


I am so excited about this!  It came at a perfect time for me!  Let me know if you are interested in anything by the 15th of November!  I'm sending the order out on the 16th!


Monday, November 8, 2021


Lovin’ It! — I couldn't be more excited about Stampin' Up!'s starter kit special.  This month only...get the starter kit for only $75!

· Are you curious about, or even hooked on Stampin' Up!?

· Would you like to get your hobby supplies at a discount?

· Do you like to share your stamping, cardmaking, and other paper crafts?

· Are you looking for a fun, friendly and supportive stamping team to work with?

Then you will want to discover the fun that comes with being a demonstrator and Join Me and my team!  (Click on Join Me on the upper right-hand side of this page)

What better time to join then now! This fabulous Starter Kit is discounted to only $75 (typically $99)!   

· Choose $125 worth of Stampin' Up! merchandise

· Get catalogs and more to share with your friends

· FREE shipping saves you 10%

· Typically includes a Paper Pumpkin kit too!


Friday, November 5, 2021

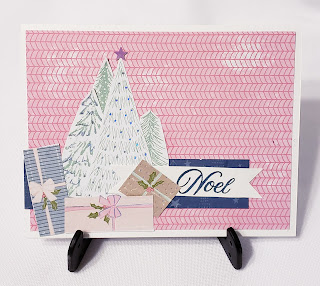
This month, my team challenge is to do a Baker's Dozen (13) different Christmas cards--that's different layouts.  I can choose anything I want to do.  My first card shows the great use of Designer Series Paper.

Using the Whimsy And Wonder DSP I cut images out and used pieces as backgrounds.  I used the Misty Moonlight ink pad and a stamp from the Poinsettia Petals stamp set for my sentiment.  I chose to take a star from our cute starts Adhesive-Backed Sequins to top the tree.  

It's easy to do once you have your layout decided.  You just put everything into place!


Product List

Thursday, November 4, 2021

Simple Sunday - Marble Technique

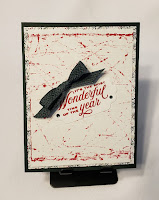
 This past month I've been introduced to several card making techniques. It's been fun learning all the new designs out there to make cards.  This one is no exception.  You will first need to choose the colors you wish to work with.  In this example I chose colors that were a part of the Tidings and Trimmings Suite, found on page 89 of the 2021-2022 Annual Catalog.  I used specifically Cherry Cobbler, Evening Evergreen, Soft Succulent and Basic White.

You will need a base that is 5-12/" x 8-1/2", scored at 4-1/4", I chose to use Cherry Cobbler

You can choose to use a DSP with this, or just a sheet of colored cardstock.  I went with:

  • 5-1/4" x 4" Tidings and Trimming Designer Series Paper
  • 5" x 3-3/4" Evening Evergreen
  • A label die or punch label for you sentiment.  I chose a die from the Seasonal Labels and die cut it in Basic White
  • You will also need a 5-1/4" x 4" Basic White for the inside of your card.
After folding your base card in half, adhere the Basic White card inside.
You will then adhere the Designer Series Paper (DSP) to the front of your base.

In a shallow container that has a lid you will place about four drops of the color of your choice.  I used my Soft Succulent refill. I placed three marbles in with the ink and swirled them around.  

On the lid, I placed my Evening Evergreen piece of cardstock, adhering it with one swipe of my Stampin' Seal on both ends. Then I placed the lid over the container, tipped it upside down and shook it to make a design on the cardstock.  I stopped a couple of times to look at it, to see if I wanted to shake it some more, or if I was happy with the design as is.  I then put that aside to dry and cleaned my marbles and container immediately.

It dries fast, so I was able to seal my design on top of the DSP sheet right away.  I then took a stamp with a sentiment I liked and with my Cherry Cobbler Stampin' Pad I stamped my sentiment on the label I had cut out.  

I then adhered the label to my marble design, added embellishments and stood in awe at how lovely the card turned out.  So simple, yet so beautiful!

Be sure to give this one a try and enjoy!


Nature's Paintings Alternative Cards

 I have introduced you, through my videos of one of our latest kits entitled, "Nature's Paintings Kit.  It comes with a "color...